At this point we’ve already installed and properly configured Windows Deployment Server on Windows 2003/Windows 2008 (Part I); and we created a full image (programs and features installed) on our Windows Vista and uploaded it to the server (Part II); the only thing missing is creating the answer files that will be used on the images to achieve the full unattended installation of our operating system.
For those using Windows Server 2003 SP1, we reviewed that among the requirements for WDS installation there was installing Windows Automated Installation Kit. This kit also gives us an important tool for the unattended files creation, the Windows System Image Manager.
So, it’s recommended for any other platform used on WDS to download this kit and install the System Image Manager. This tool it’s not a requirement for creating the unattended files.
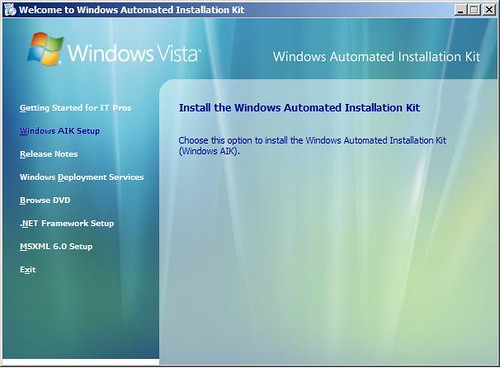
Installing WAIK
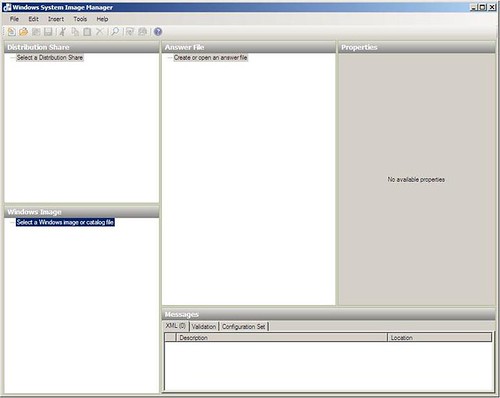
Preparing the Files Using System Image Manager
System Image Manager provides us the way to, using the .wim (or .clg) file for an installation, select the components that are necessary within the answer files. This way we can be sure that the answer options selected are used on the right place at the right time:
- Open System Image Manager for Start Menu.
- Click on File and click on Select Windows Image.
- Select the .wim file that we previously created or just use the file from the installation media (install.wim).
- You can also select the catalog files (.clg): these are the specific files for each Windows Vista version (Home Ed, Enterprise, Ultimate, etc).
- To start creating, on the File menu select New answer file.
Adding a .wim or .clg files is not a requirement, but you won’t be able to validate or check the errors on unattended files that is not using an OS image as a reference.
For more information, visit the site Windows System Image Manager Technical Reference.
We’ll create two files that are necessary for a complete unattended image installation:WDSClientUnattend.xml and AutoUnattend.xml.
Note: All of the components that we’ll add here are associated to 32bit images because the installation file selected has that architecture. If we uploaded a 64bit image, you’ll see an answer file with x64 components.
WDSClientUnattend
Download WDSClientUnattend.xml example here.(Change file extension from .doc to .xml to start using it or you can still open it as a Word file).
This is the first file used by WDS to respond to all the first configurations on the Windows PE: Disk partitions (creating, modifying) and selecting the image from WDS that we are going to install.
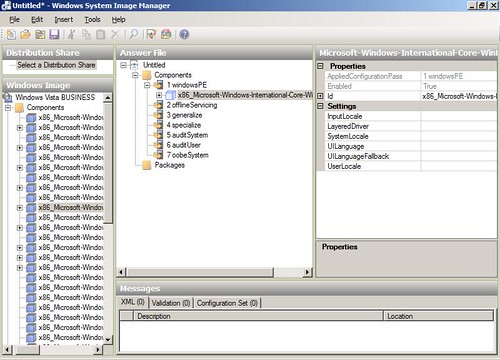
As you can imagine, all the components that we will add will go on Windows PE cycle:
- x86_Microsoft-Windows-International-Core-WinPE_6.0.6000.16385_neutral\
SetupUILanguage - x86_Microsoft-Windows-Setup_6.0.6000.16385_neutral\DiskConfiguration\
Disk\CreatePartitions\CreatePartition - x86_Microsoft-Windows-Setup_6.0.6000.16385_neutral\DiskConfiguration\
Disk\CreatePartitions\ModifyPartition - x86_Microsoft-Windows-Setup_6.0.6000.16385_neutral\DiskConfiguration\
ImageInstall\OSImage\InstallTo - x86_Microsoft-Windows-Setup_6.0.6000.16385_neutral\DiskConfiguration\
WindowsDeploymentServices\ImageSelection\InstallImage - x86_Microsoft-Windows-Setup_6.0.6000.16385_neutral\DiskConfiguration\
WindowsDeploymentServices\ImageSelection\InstallTo - x86_Microsoft-Windows-Setup_6.0.6000.16385_neutral\DiskConfiguration\
WindowsDeploymentServices\Login\Credentials
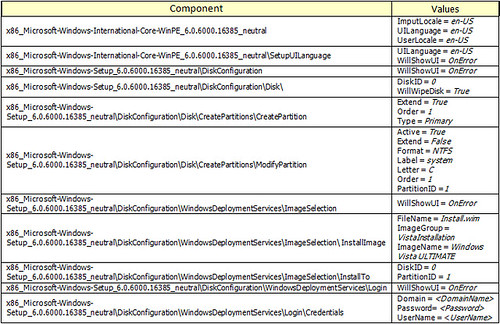
Here’s an example of all the components and values that can be inserted on the answer file. On the values I have set in here I’m doing the following:
- Setup and keyboard language: English
- Delete and create a single NTFS partition on root disk.
- The partition will take the complete size of the HD.
- Label: system.
- Installation Group: VistaInstallation. This is the group that we created when we uploaded the image.
- File: Install.wim. This is the name of the installation file that we uploaded.
- Image Name: This is the description name that we used on the installation that we uploaded.
- User and domain name that will be used to login and choose available images. No higher privileges needed on the user.
To confirm that the answer file has no errors, click on Tools and Validate Answer File. All the errors will be displayed and explained on the lower panel.
Once the file is validated click on Save and use the name WDSClientUnattend. This file must be stored inside the folder of installation files created by default:/RemoteInstall/WDSClientUnattend.xml
AutoUnattend
Download AutoUnattend.xml example here.(Change file extension from .doc to .xml to start using it or you can still open it as a Word file).
This is the file that we are using to answer all the Vista configurations: Product key, computer name, domain joining, local users and passwords, etc.
The components that need to be added are the following:
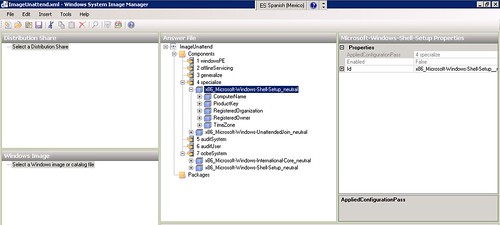
Cycle 4: Specialize
- x86_Microsoft-Windows-Shell-Setup_6.0.6000.16385_Neutral
- x86_Microsoft-Windows-UnattendedJoin_neutral\Identification\Credentials
Cycle 7: OobeSystem
- x86_Microsoft-Windows-International-Core_6.0.6000.16385_Neutral
- x86_Microsoft-Windows-Shell-Setup_6.0.6000.16385_Neutral\OOBE
- x86_Microsoft-Windows-Shell-Setup_6.0.6000.16385_Neutral\Themes
- x86_Microsoft-Windows-Shell-Setup_6.0.6000.16385_Neutral\UserAccounts\AdministratorPassword
- x86_Microsoft-Windows-Shell-Setup_6.0.6000.16385_Neutral\UserAccounts\
LocalAccounts\LocalAccount\Password
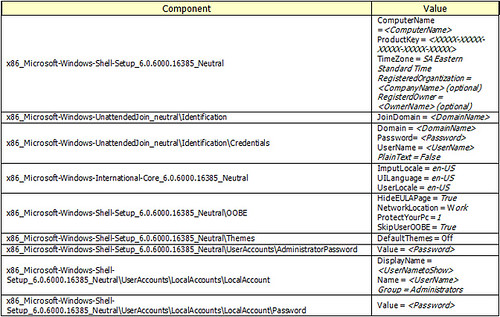
Here’s an example of the values selected:
- ComputerName: If you set the value “*” on the computer name will be selected randomly (using RegisteredOwner value).
- The user name inserted in “Credentials” will be the user that will join the computer to the domain. No higher privileges needed for this user, but remember a normal user can only join 10 computers to the domain.
- ProtectYourPc: If 1 establishes that the updates will be automatically downloaded and installed.
- LocalAccount: User added here will be created locally and in this example is also member of the Administrators group.
To confirm that the answer file has no errors, click on Tools and Validate Answer File. All the errors will be displayed and explained on the lower panel.
Once the file is validated click on Save and use the name AutoUnattend. You can locate this answer file on any folder.
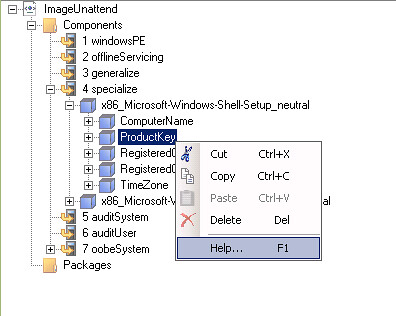
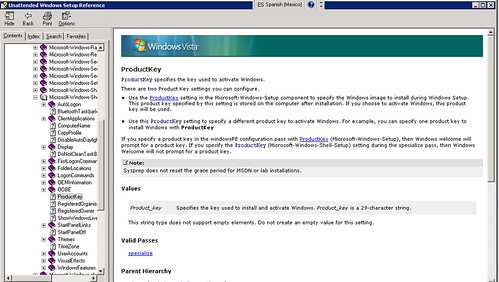
Note: A good thing about System Image Manager is that for each component that you have here, you can access to the description of it. If you have any doubt on the values that you are placing, take a look to the help file.
Associating Unattended Files
Now that we have the both files necessary, all we need is to associate each file to the images we are going to install:
1. Associating WDSClientUnattend.
a) Open the WDS console on your server.b) On the servers listed on the snap-in, right click on the server name and selectProperties.c) Open Client and select Enable Unattended Installations.
d) According to the architecture where you created the image, browse for theWDSClientUnattend.xml file.
2. Associating AutoUnattend
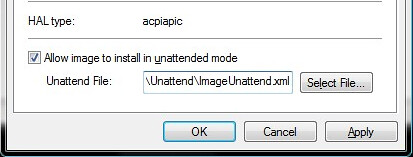
a) On the Installation Images, open VistaInstallation.b) Right click on the image that you uploaded and select Properties.c) Select the option Allow image to install in unattended mode.d) Click on Select File and browse for AutoUnattend.xml.
And there you go; you have the complete environment to install full and unattended images of Windows Vista.
You have to remember that at the moment of booting a client machine, once you’ve selected the WindowsPE image to boot, the complete installation process will not require any user intervention. If you have to select on clients different disk options or partitions, you can deselect the option where you choose the WDSClientUnattend file; with this you’ll get to manually introduce any changes on image selection and disk management.
Common Issue on x64 images and WDS
I’ve encountered that there are some scenarios that the 64bits images are not available for selection on a deployment, even though you have correctly uploaded to the WDS Server and the client supports x64 architecture.
The problem is that when the client connects to the WDS Server (soon after you pressed F12 to boot from the network) it doesn’t notify that it is x64 compatible client. And for the server, the client is just x86 compatible and the rest of the images do not apply for it.
To solve it:
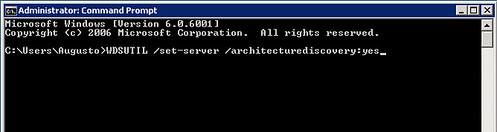
1. Open a cmd on the WDS Server
2. Insert WDSUTIL /set-server /architecturediscovery:yes
And the next time any client contacts the WDS Server, will first notify about if is x64 compatible.
Hope you find this guide useful.
Nice post
ReplyDelete